

Hosting your own site doesn’t need to cost a monthly fee or doesn’t require much of technical knowledge to setup. If you just wanted to host a smaller website which has only few number of visitors, you can transform your Windows PC into a WAMP server.
While hosting your own site on your PC is a lot of fun, if you need a site that individuals can really get to, you might need to get your own particular web hosting plan at some place. Bluehost, the leading web hosting provider is providing the unlimited web hosting for $3.95 every month, with full support for PHP and MySQL. It’s unquestionably a simple approach to begin with a site, and they have basic 1-click installers to kick you off with prevalent softwares like WordPress and others.
If you do host your own particular site that you need individuals to get to, you’re going to need to open up your firewall to your home PC, and that implies you’re possibly opening up some security holes. It’s a worth getting an affordable hosting plan somewhere else, as Bluehost or others.

If you simply need a local server, well you found the right post. In this post I will show you the process to configure WAMP to begin a web server and host your own site for testing and personal projects. You might have one or a few reasons why you would need to have your own site, maybe you need to:
- Host a smaller individual Blog.
- Host a portfolio site.
- Host your resume.
- To test a web application.
Alternately just essentially to learn how to setup your own web server.
Any of these activities can be effectively hosted from your own web server without paying an organization for web hosting.
Note: It would not be the right process if you are doing anything complex, similar to a business or eCommerce site, or for the most part a site that you hope to develop and get a considerable measure of activity, as most ISP would not allow this and regardless of the fact that they do you will likely wind up investing additional time and money on better software and tools to manage. However, I suggest using a good web host, as SiteGround or HostGator, for these types of projects.
What is “WAMP”?
WAMP is an acronym which stands for “Windows, Apache, MySQL, and PHP”. When you download a WAMP, you are simply downloading a project that install three distinct things. WAMPs are helpful as that they allow you to download and install the complete packages you need for hosting the dynamic web content all at once. Else, you’d need to download the three packages independently.
Windows – The “W” in WAMP is to determine that the project is perfect with Windows OS.
Apache – This is the program that is utilized to really have your site. With only it, you can have HTML files and other static web content.
MySQL – This gives a database to your web content. A lot of website pages need to store information (i.e. usernames and secret word for web accounts), which is the place MySQL comes in.
PHP – The most well known languages for composing dynamic web content – by a wide margin. WordPress, Facebook, Joomla, and numerous different sites and content managements systems use PHP. In the event that you plan to have much else besides static website pages, PHP will be a right option.
In case you’re running Linux rather than Windows, you’ll have to install a LAMP. It is possible to have a site on Windows utilizing IIS so you don’t host to install any third party. Going the IIS course isn’t prescribed for most purposes and it’s a great deal to a greater extent a procedure to bolster dynamic web content – so stay with WAMP unless you have a one of a kind situation requiring IIS.
Before we continue, please do understand that hosting a site on a PC and a customer evaluation web association is not suggested for anything past testing purposes and/or facilitating a little site for a couple of guests. Keep in mind, whenever Windows Update needs to restart your system, your site runs down alongside it – not a perfect circumstance for a genuine site.
How to Install WAMP Server?
Let’s get started,
- Download WAMP
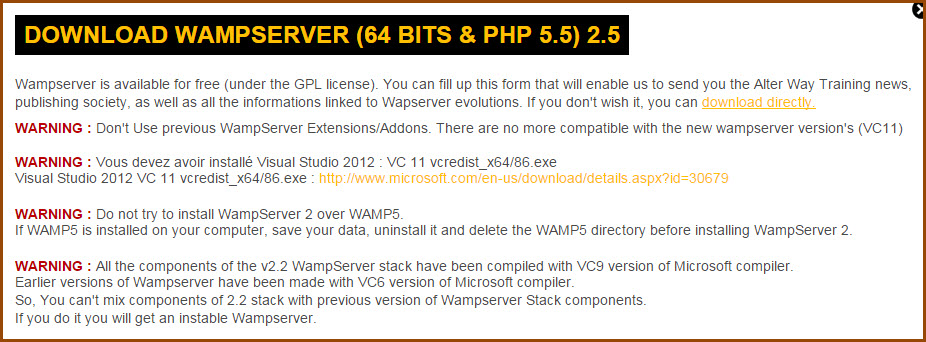
- The initial step is to download WAMP from www.wampserver.com, Based upon your version of Window, you should pick the x32 bit or x64 version.
- On the off chance that you don’t know which form of Windows you are utilizing, you can check by doing a Right-tap on Computer (Win 7) or This PC (Win 8) and selecting Properties.
When you tap on one of the choices above, you will get this message.
- The Visual C++ for Visual Studio is required. On the off chance that you don’t have this installed, you will experience the accompanying error message:
The Program can’t begin on the grounds that MSVCR110.dll is lost from your PC. Attempt re-installing the project to settle this issue.
So, if you are not certain you have it, head over to Control Panel\Programs\Programs and Features and check whether it shows up in your projects list.
If it doesn’t, I suggest you download and introduce it before introducing WAMP server. The connection gave will take you to the download page.
When you install MS Visual C++, download WAMP Server and save it to your download cover.
- Installing WAMP.
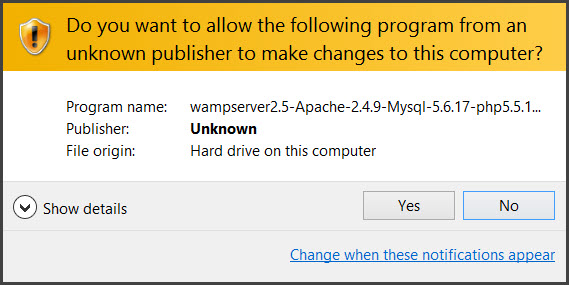
When you have saved it, double tap on it to run the downloaded program.

Allow the system to keep clicking so as to run ‘Yes
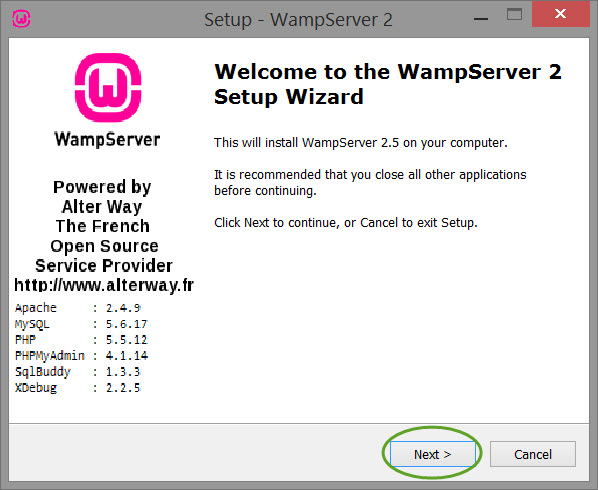
When you run the package you will get the accompanying arrangement of screens. Click on ‘Next’
Acknowledge the permit understanding and snap “Next”
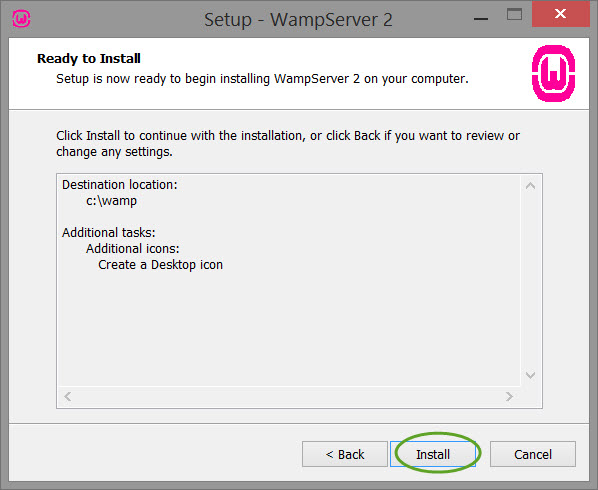
Click on ‘Next’. I prescribe leaving the default way of C:\wamp
Select your inclination and click on ‘Next’. I get a kick out of the chance to make a Desktop symbol as it were.
You are now prepared to go! Click on Install..
WAMP will start installing every single essential document.
Pick your default program and snap ‘Open’. I more often than not leave this as is and click ‘open’.
You can likewise leave this as default and snap ‘Next’. For nearby advancement, you will probably not utilize this component, but rather on the off chance that you do, simply ahead and enter your SMTP settings and your favored email
You are good to go. Click “Complete” and sit back.
On the off chance that Window’s User Account Control is still empowered you will then be provoked again to permit wampmanager.exe. Click ‘Yes’.
WAMP Server ought to now be running and you ought to see the wamp symbol on your desktop.
- Testing WAMP Server
If all kept running as it expected to, you will see the WAMP Server symbol on your framework plate and it ought to be shading GREEN. This mean all administrations are running fine.
When it is installed you will see the green light on the wamp symbol on your system.
If the symbol is red or orange, you have a contention with another application. For my situation, more often than not I experience this issue is if IIS is running on the machine. You can check what administration is utilizing port 80 in the event that you need to affirm this. Go to Apache –> Service –> Test Port 80 and see which administration is utilizing port 80. On the off chance that IIS is utilizing the port, you will need to cripple the accompanying administration: IIS Admin Service and World Wide Web Publishing Service.
- Set WAMP Server to keep running on software
Arrange the ‘Startup Type’ under Window administrations to software for both wampapache64 and wampmysqld64 services.
Presently you will need to make wampmanager.exe begin when Windows begins. So in the event that you re-begin your server, or it re-begins itself because of Windows redesigns, power surges, or other erratic cause, your are secured.
Look at my post on Configuring WAMP Server on Windows for WordPress neighborhood advancement for further points of interest on the best way to do this stride.
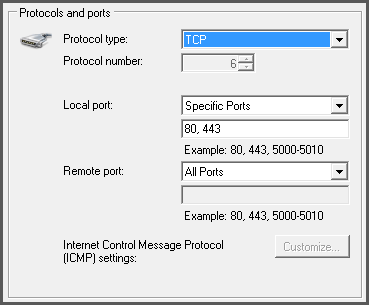
- Arrange Windows Firewall to permit wampmanager, port 80 and 443
Port 80 and 443 must be take into consideration both TCP and UDP bundles. To do this, make 2 inbound tenets for TPC and UDP on Windows Firewall for port 80 and 443.
Set the MySQL root password
This is a critical step. I propose making a solid secret word with upper and lower case letters and numbers, toss in a couples of images as well. There are a couple of approaches to do this, one is by setting off to the MySQL support and writing the proper orders, another way is by means of the GUI (graphical client interface) utilizing SQL Buddy or PHPMyAdmin. Go to my post on the most proficient method to set the Root secret word for MySQL for ventures by steps guidelines on the best way.
Arrange PHPMyAdmin
Arrange phpMyAdmin to require a secret word. Open the config.inc.php document found in C:\wamp\apps\phpmyadmin[version#] and alter the following:
$cfg[‘Servers’][$i][‘auth_type’] = ‘config’;
Change “config” to ‘http’.
$cfg[‘Servers’][$i][‘user’] = ‘root’;
Delete client root and simply leave the quotes unfilled, similar to so = ” ‘;
$cfg[‘Servers’][$i][‘AllowNoPassword’] = genuine;
Change consistent with false.
Make a Log Out URL by including the below line..
$cfg[‘Servers’][$i][‘LogoutURL’] = ‘http://your-outer ip-address/’;
Presently, on the off chance that you have a static IP, you ought to be alright entering it here. Be that as it may, in the event that you don’t, care for the vast majority of us, then you will need to enter the area you anticipate utilizing for your site (suggested).
Save your document and go to C:\localhost\phpmyadmin – You ought to be provoked for a client name and secret key at this point.
phpmyadmin-login-brief
Improving Security
If you don’t mind take note of that WAMP Server is usually utilized for nearby advancement, and not as a hosting platform for generation as it is intrinsically un-secure. In any case, you can take a few measures to secure it such as the ones I am going to recommend here.
Here are a couple of things to check for: Open your httpd-default.conf document found under C:\wamp\bin\apache\apache[version#]\conf\extra and ensure you set the accompanying parameters..
ServerTokens Prod
This mandate designs what WAMP returns as the Server HTTP reaction, setting it to goad gives back the slightest information.
ServerSignature Off
This will prevent Apache from television the server signature, which incorporates server rendition and virtual host name and other perhaps touchy data.
TimeOut 60
This will anticipate DoS assaults. It ought to be 60 as a matter of course however check to be safe.
Re-begin all services in the event that you haven’t been clicking so as to do as such on ‘Restart all administrations’.
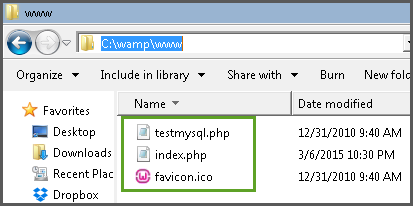
You are verging on done, next step is to evacuate the records in the www organizer. You can erase them or move them to another organizer outside www.
wamp-server-records in-www.
You can now put your site documents in here.
For extra security, I recommend setting a record document in the root and any sub registry of your site. Including a htaccess record with an unapproved index searching principle would be perfect